Introduction
Have you ever stood in front of a bakery display case and thought, “That looks amazing, but I could never make something like that”? You’re definitely not alone. In fact, that thought is much more common—and much less true—than most people realize.
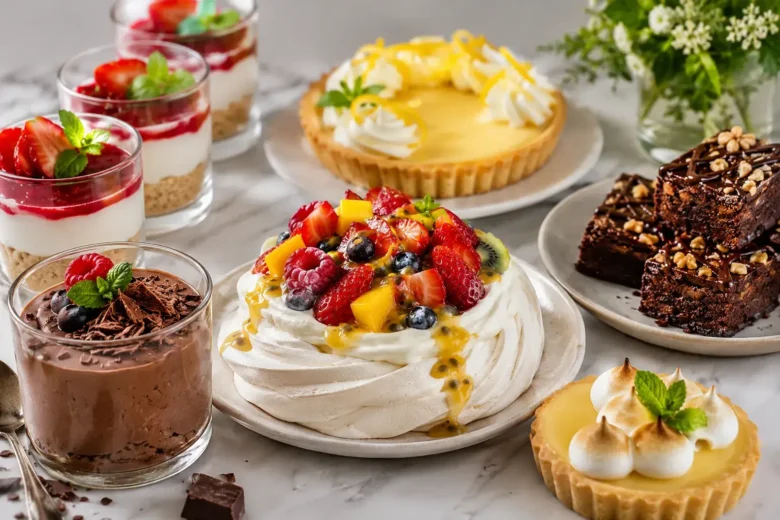
The reality is that many of the stunning desserts you see at parties, on Instagram, and in food blogs aren’t necessarily the most difficult ones to make. What makes them look extraordinary is often a collection of simple presentation techniques that anyone can learn.
Professional pastry arts—with chocolate tempering, pulled sugar, piping techniques, and advanced French pâtisserie skills—require years of practice and specialized equipment. But creating visually stunning desserts for friends and family at home? That’s absolutely achievable with a mixing bowl, a hand mixer, and a little enthusiasm.
The secret is choosing the right recipes, combining colors and textures intentionally, and adding those finishing touches that transform something simple into something elegant.
In this guide, you’ll learn five beautiful and delicious desserts that even beginners can master, plus a special section packed with presentation tips that will have everyone asking where you learned to bake.
Spoiler alert: the answer is your own kitchen.
The Secret Behind Visually Stunning Desserts
Before jumping into the recipes, it’s important to understand what actually makes a dessert look beautiful. And trust me—it isn’t complicated techniques.
It comes down to three simple elements.
Height and Layers
Desserts served in clear glasses or jars, showcasing layers of different textures and colors, instantly look sophisticated. You don’t need cake decorating skills; simply stacking components strategically creates an elegant effect.
Color Contrast
A dark chocolate mousse topped with bright red raspberries and white whipped cream is already a masterpiece. Fresh fruits, colorful sauces, and creamy fillings do most of the visual work for you.
The Finishing Touch
A mint leaf, a dusting of cocoa powder, chocolate shavings, or an edible flower can instantly elevate a homemade dessert into something restaurant-worthy. Best of all, these details take less than 30 seconds to add.
Keep these three principles in mind, and the recipes below will make perfect sense.
1. Chocolate Mousse Cups with Fresh Berries
A Classic Dessert with Bakery-Worthy Presentation
Chocolate mousse is one of the world’s most beloved desserts—and for good reason. It’s rich, creamy, relatively easy to make, and absolutely gorgeous when served in individual dessert glasses.
Ingredients (Serves 6)
- 7 oz (200 g) high-quality semisweet chocolate
- 3 eggs, separated
- 3 tbsp granulated sugar
- 7 oz (200 g) heavy cream
- Pinch of salt
- Strawberries, raspberries, or blueberries for garnish
- Dark chocolate shavings
- Fresh mint leaves
Instructions
Melt the chocolate using a double boiler or microwave in 30-second intervals, stirring between each interval.
Stir the heavy cream into the melted chocolate until smooth. Add the egg yolks one at a time, mixing well after each addition.
In a separate bowl, whip the egg whites with a pinch of salt until soft peaks form. Gradually add the sugar and continue beating until stiff peaks form.
Gently fold the whipped egg whites into the chocolate mixture in three additions, using slow upward motions to preserve as much air as possible.
Divide among serving glasses and refrigerate for at least 3 hours.
Before serving, decorate with fresh berries, chocolate shavings, and a mint leaf.
Pro Tip
For extra texture and visual appeal, place a layer of crushed cookies or graham cracker crumbs at the bottom of each glass before adding the mousse.
2. Rustic Pavlova with Whipped Cream and Fresh Fruit
The Dessert That Looks Impossible but Isn’t
Pavlova has a reputation for being difficult, but a rustic version is surprisingly beginner-friendly. Better yet, imperfections are part of its charm. Cracks are not mistakes—they’re a sign of a good pavlova.
Ingredients (Serves 8)
- 4 egg whites, room temperature
- 1 cup (200 g) granulated sugar
- 1 tsp white vinegar
- 1 tsp cornstarch
- 1¼ cups (300 ml) cold heavy whipping cream
- 2 tbsp powdered sugar
- Assorted fresh fruit: strawberries, kiwi, passion fruit, blueberries, mango
Instructions
Preheat the oven to 250°F (120°C).
Line a baking sheet with parchment paper and draw an 8½-inch (22 cm) circle as a guide.
Beat the egg whites until stiff peaks form. Gradually add the sugar, one spoonful at a time, beating continuously until glossy and firm.
Gently fold in the vinegar and cornstarch.
Spread the meringue inside the circle, creating slightly higher edges than the center.
Bake for 1 hour and 20 minutes.
Turn off the oven and leave the pavlova inside, with the door closed, for an additional hour.
Whip the cream with powdered sugar until firm peaks form.
Spread over the cooled pavlova and generously top with fresh fruit.
Pro Tip
Assemble the pavlova no more than an hour before serving to maintain its crisp texture.
3. No-Bake Strawberry Cheesecake Jars
Beautiful, Easy, and Completely Oven-Free
This jar-style cheesecake is one of the easiest ways to create an impressive dessert. The visible layers make it incredibly photogenic and appealing.
Ingredients (Serves 6)
For the Crust
- 7 oz (200 g) graham crackers or digestive biscuits
- 5½ tbsp (80 g) melted butter
For the Filling
- 14 oz (400 g) cream cheese, softened
- 7 oz (200 g) heavy cream
- 5 tbsp powdered sugar
- Juice of ½ lemon
- 1 tsp vanilla extract
For the Strawberry Sauce
- 10 oz (300 g) strawberries, chopped
- 4 tbsp sugar
- Juice of ½ lemon
Instructions
Crush the cookies into coarse crumbs and mix with melted butter.
Divide among six jars or dessert glasses and lightly press down.
Beat the cream cheese, powdered sugar, heavy cream, lemon juice, and vanilla until smooth and creamy.
Spoon over the cookie base.
For the sauce, cook strawberries, sugar, and lemon juice over medium heat for about 8 minutes until thickened.
Cool completely before adding over the cheesecake layer.
Refrigerate for at least 3 hours.
Garnish with a whole strawberry and a mint leaf before serving.
Pro Tip
Using jars of varying heights creates a visually interesting dessert table.
4. Deconstructed Tiramisu Cups
Italian Elegance Made Easy
Traditional tiramisu requires careful layering in a large dish. This individual version delivers the same incredible flavor while being much easier to assemble.
Ingredients (Serves 6)
- 9 oz (250 g) mascarpone cheese (or cream cheese)
- 3 egg yolks
- 4 tbsp sugar
- ¾ cup (200 ml) heavy cream
- 1 cup strong espresso, cooled
- 2 tbsp coffee liqueur or dark rum (optional)
- 20 ladyfinger cookies
- Unsweetened cocoa powder
- Dark chocolate shavings
Instructions
Beat the egg yolks and sugar until pale and fluffy.
Mix in the mascarpone until smooth.
Whip the heavy cream to stiff peaks and gently fold into the mascarpone mixture.
Combine the espresso with the liqueur.
Quickly dip each ladyfinger into the coffee mixture and break in half.
Layer the dessert glasses with soaked ladyfingers and mascarpone cream, repeating once more.
Finish with a final layer of cream.
Dust generously with cocoa powder using a fine mesh sieve and top with chocolate shavings.
Refrigerate for at least 4 hours, preferably overnight.
Pro Tip
A fine sieve creates an even cocoa layer that instantly makes the dessert look professionally finished.
5. Mini Lemon Curd Tartlets
Small, Elegant, and Absolutely Irresistible
These tartlets look like something from a high-end pastry shop, yet the lemon curd is surprisingly simple to make.
Ingredients (Makes 8 Tartlets)
For the Tart Shells
- 1⅔ cups (200 g) all-purpose flour
- 7 tbsp (100 g) cold butter, cubed
- ⅓ cup (50 g) powdered sugar
- 1 egg yolk
- 2 tbsp ice water
- Pinch of salt
For the Lemon Curd
- Juice of 3 lemons
- Zest of 2 lemons
- 3 eggs
- ¾ cup (150 g) sugar
- 5½ tbsp (80 g) butter, cubed
For Garnishing
- Fresh berries
- Mint leaves
- Powdered sugar
Instructions
For the tart shells, combine flour, powdered sugar, and salt.
Cut in the butter until the mixture resembles coarse crumbs.
Add the egg yolk and ice water until the dough comes together.
Wrap and refrigerate for 30 minutes.
Press into tartlet pans, prick the bottoms with a fork, and bake at 350°F (180°C) for about 15 minutes or until golden.
Cool completely.
For the lemon curd, whisk together lemon juice, zest, eggs, and sugar in a microwave-safe bowl.
Microwave on medium power for 1 minute.
Stir and repeat 3–4 times until thickened.
Add butter and stir until melted and smooth.
Strain through a fine sieve and cool.
Fill the tart shells with lemon curd.
Decorate with berries, mint leaves, and a light dusting of powdered sugar.
Pro Tip
The lemon curd can be prepared up to five days in advance and refrigerated.
Styling Tips for Picture-Perfect Desserts
Use Clear Glassware
Transparent glasses, jars, and dessert cups showcase layers beautifully.
Work with Odd Numbers
Groups of three or five desserts often look more visually appealing than even-numbered arrangements.
Add Fresh Garnishes
Mint leaves, berries, citrus zest, and edible flowers instantly elevate presentation.
Vary Heights
Cake stands, wooden boards, and elevated serving trays create a more dynamic dessert display.
Keep It Clean
Wipe glass rims and plate edges before serving. Small details make a big difference.
Conclusion
Creating stunning desserts doesn’t require professional pastry training or expensive equipment. With thoughtful presentation, simple techniques, and a few strategic finishing touches, anyone can create desserts that look like works of art.
The best part is that these recipes are not only beautiful—they’re delicious, approachable, and designed to help beginner bakers succeed.
So grab your mixing bowl, choose your favorite recipe, and prepare for the compliments to start rolling in. Your guests may never believe how easy these desserts actually were to make.