I’ll never forget the guy who walked into my shop with a “top-tier” home bench setup he’d built himself. He was trying to run a 3,000-watt competition amp off a 30-amp generic industrial power supply. He thought that because he wasn’t “cranking it,” the supply would hold up. Within five minutes of a heavy Re-bassed track, the power supply didn’t just shut down—it literally exploded, sending shards of a capacitor casing across my workbench.
He made the classic amateur mistake: he confused “average draw” with “peak demand.” In car audio, especially when you are bench testing or running a show-car setup on AC power, Amperage is your lifeblood. If you starve the amp of current, the amp will try to “suck” more than the supply can give, the voltage will crash, and the internal components will turn into heating elements.
Choosing the right power supply isn’t about finding the biggest number on the sticker; it’s about understanding the physics of energy conversion. If you want to avoid the “magic smoke” and get every decibel you paid for, you need to understand the math of current. In this guide, I’m going to break down the exact engineering process I use to size power supplies for everything from daily drivers to world-record SPL rigs.
The Fundamentals: Why Amperage is the “Fuel” of Your Sound
In any Car Audio System, we talk a lot about Watts. But Watts are just the end result. To get Watts, you need a specific combination of Voltage (pressure) and Amperage (volume). Think of your power supply as a fuel pump. If your engine needs 50 gallons per minute to run at full throttle, but your pump only provides 10, the engine dies.
Most car amplifiers are designed to run on a stable 14.4V DC rail. When the bass hits, the amplifier’s power supply section has to convert that 14.4V into a much higher internal voltage to drive the speakers. This process is incredibly demanding. If the Amperage isn’t there to back it up, the voltage drops, the sine wave clips, and your expensive subwoofers start to cook.
To find out how many Amps you need, we have to work this formula backward while accounting for the “Efficiency Tax.”
The Efficiency Equation: Why 1,000 Watts Isn’t Just 1,000 Watts
This is where most people get the math wrong. They think a 1,000-watt amp needs 70 amps (1,000W / 14.4V = 69.4A). They are wrong. No amplifier is 100% efficient.
Amplifiers lose energy in the form of heat. Depending on the architecture of your Amplifier, you need to adjust your amperage requirements:
- Class D Amplifiers: These are the modern standard for subwoofers. They are roughly 75% to 85% efficient.
- Class A/B Amplifiers: Commonly used for door speakers for their sound quality. These are only about 50% to 60% efficient.
If you have a 1,000-watt Class A/B amp, it actually needs to pull about 1,600 to 2,000 watts of input power to put out 1,000 watts of output power. That extra energy is wasted as heat, and your Car Audio Power Supply has to provide it.
How to Calculate Your Total Amperage Needs: A Step-by-Step Guide
Let’s do a real-world calculation. Imagine you are building a bench setup to demo a system with:
- One 2,000W RMS Class D Monoblock (80% efficient).
- One 400W RMS Class A/B 4-Channel (60% efficient).
Step 1: Calculate Input Watts for the Monoblock 2,000W / 0.80 = 2,500 Input Watts.
Step 2: Calculate Input Watts for the 4-Channel 400W / 0.60 = 666.6 Input Watts.
Step 3: Total Input Watts 2,500 + 666 = 3,166 Total Watts.
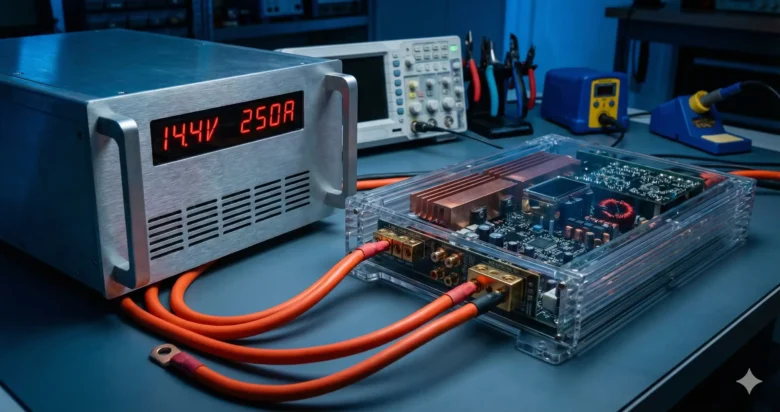
Step 4: Divide by Voltage (14.4V) 3,166W / 14.4V = 219.8 Amps.
In this scenario, a 100A power supply will fail. You would need at least a 250A DC Power Supply to run this system at full tilt without crashing the voltage.
Bench Power Supplies vs. High Output Alternators
When you are in a car, the High Output Alternator is your power supply. It’s dynamic and tied to engine RPM. However, for “parking lot” demos or bench testing, you rely on AC-to-DC switching power supplies.
The biggest difference is impedance. A battery can deliver thousands of “cranking amps” for a split second. A switching power supply (SMPS) usually has a hard limit. If you pull 101 amps from a 100-amp supply, it will either shut down or its voltage will drop off a cliff.
This is why “Headroom” is vital. I always recommend sizing your power supply to be 20% larger than your maximum calculated draw. This keeps the supply running cooler and prevents it from hitting its current-limit protection during a heavy bass drop.
The Role of Capacitance in Power Delivery
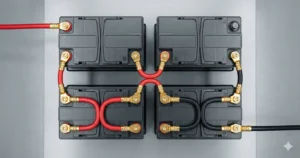
If you are using a power supply for a bench setup, adding a Car Battery (like an AGM or Lithium) in parallel with the power supply is a pro-level move. The power supply acts as the “charger” (the alternator), while the battery acts as a massive buffer.
When a sudden bass note hits, the battery provides the immediate “burst” of amperage that the power supply’s switching circuitry might be too slow to provide. This smooths out the Voltage Ripple and keeps the amplifier’s power supply happy.
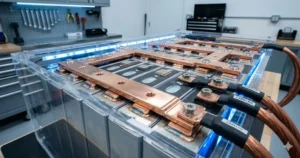
Wire Gauge: The “Pipe” That Carries the Current
You can have a 500-amp power supply, but if you connect it to your amp with 4-gauge wire, you’ve created a massive bottleneck. At high amperage, the wire itself becomes a resistor.
For any power supply setup pushing over 150 amps, 0 Gauge OFC Cable is the only way to go. Do not use CCA (Copper Clad Aluminum). Aluminum is more resistive, meaning you lose more voltage over the wire length, which negates the benefit of a high-quality power supply.
Fusing and Circuit Protection: Don’t Skip This
Every Car Audio Power Supply run must be protected. If a 200-amp supply shorts out, it can melt a cable in seconds.
- ANL Fuses: The gold standard for high-current car audio. Reliable and low resistance.
- Magnetic Circuit Breakers: Great for bench setups because they are resettable, but ensure they are high-quality (like Bussmann), as cheap breakers often trip prematurely due to heat.
The Impact of Low Amperage on Sound Fidelity
What does “starving” an amp actually sound like?
- Soft Clipping: The bass loses its “edge” and sounds muddy.
- Stereo Image Collapse: On a 4-channel amp, as the power supply struggles, the high frequencies might become harsh or grainy.
- Thermal Protection: The amp gets hot much faster because it’s working harder to maintain output with low input voltage.
By choosing a supply with the correct Amperage, you ensure the “Slew Rate” and “Damping Factor” of your amplifier remain optimal, resulting in tight, controlled, and musical sound.
Conclusion: Engineering the Perfect Setup
In the end, choosing the right Car Audio Power Supply is about respecting the laws of physics. Calculate your RMS, account for your efficiency losses, and always add a margin for safety. Whether you are building a competition-crushing wall of subs or a high-fidelity sound quality rig, current is the foundation of everything you hear.
Keep your voltage high, your resistance low, and your amperage plentiful. That is the secret to a system that doesn’t just play loud but plays forever.
FAQ:
1. Can I link multiple smaller power supplies to get more amperage? Yes, but they must be “Parallel-Capable.” If they aren’t designed to work together, one supply might try to take the entire load, overheat, and shut down while the others sit idle. Always match the voltage outputs exactly before connecting them.
2. Why does my power supply voltage drop when the amp is at idle? This is often due to a “Switching Mode” quirk where the supply needs a minimum load to stabilize. However, if the drop is significant, check your ground connection. A loose ground is the most common cause of voltage drop in both cars and bench setups.
3. Is a “12V” power supply enough for a car amp? Technically yes, but car amps are rated at 14.4V. If you run an amp at 12V instead of 14.4V, you will lose about 20% to 30% of your potential power output. Look for an “adjustable” power supply that can be dialed up to 14.4V or 14.8V for peak performance.