I remember a 1998 Chevy Tahoe that rolled into my shop about ten years ago. The owner had just finished a DIY install: three 15-inch subwoofers and a 5,000-watt RMS monster amp that cost him a month’s salary. He was beaming with pride, but as soon as the first deep bass note hit, the dash lights flickered like a strobe light and a sharp, metallic smell of burning electronics filled the cabin.
The mistake was simple but fatal. He believed the “0-gauge” wire he bought for a “steal” on eBay was enough, not realizing it was cheap aluminum (CCA) that couldn’t handle the current. He was experiencing a Voltage Drop so severe that his amplifier, trying to compensate for the lack of pressure, pulled massive amperage and cooked its internal power supply. He had no way to see it happening—he was driving blind into a total equipment meltdown.
If you value your gear and want peak performance, understanding how energy flows—and where it disappears—is the difference between a system that slams and a system that smokes. In this guide, I’m going to show you exactly how to master your car’s electrical system and why real-time monitoring is the only insurance policy you truly need.
What Exactly is Voltage Drop?
In the world of Car Audio, Voltage Drop is the loss of electrical potential as current travels from your power source (battery/alternator) to your load (the amplifier). Think of it like a garden hose: if the hose is too thin or too long, the water pressure at the nozzle is much lower than at the faucet. In electricity, that “pressure” is your voltage.
To understand this, we have to look at the foundation of all electrical engineering: Ohm’s Law. It tells us that voltage is the product of current and resistance. If your power wire has high resistance, the voltage reaching your Car Audio System will plummet.
When your voltage falls below a certain threshold—usually 12V while the engine is running—your amplifier begins to operate outside its efficiency window. This generates heat, causes Clipping, and eventually triggers “Protect Mode” or total board failure.
The Silent Killer: OFC Cable vs. Copper Clad Aluminum (CCA)
Too many enthusiasts spend $1,000 on a sub and then try to save $50 on the wire. This is the fastest way to kill your gear. The market is flooded with CCA cables. They look like copper, but they are mostly aluminum. The problem? Aluminum has only about 60% of the conductivity of copper.
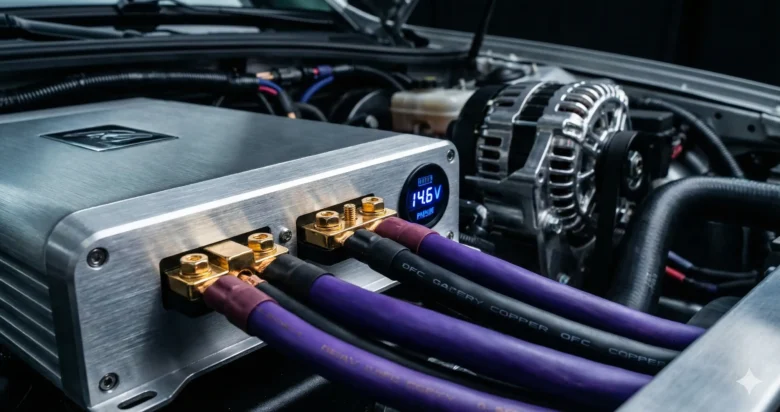
Using a high-quality OFC Cable (Oxygen-Free Copper) is mandatory for any serious build. Copper offers significantly lower resistance per foot, ensuring that the 14.4V produced by your High Output Alternator actually makes it to the amplifier’s terminals without being turned into wasted heat.
- OFC Cable: Pure copper, maximum conductivity, stays cool under load.
- CCA Cable: Aluminum core, high resistance, oxidizes quickly, creates massive Voltage Drop.
- The Pro Tip: If the wire feels suspiciously light or the strands look “silvery” when you cut them, it’s CCA. Throw it away.
Calculating the Invisible Thief
If you want to be a pro, you don’t guess—you calculate. You need to know exactly how much voltage you are losing over the length of your run. For a 15-foot run of power wire, even a small increase in resistance can steal 1 or 2 volts, which represents a massive loss in wattage.
If you are pulling 200 Amps through a wire that isn’t thick enough, you aren’t just losing sound—you are turning your power wire into a heating element. This is why choosing the correct Gauge Wire is the most important decision in your installation.
Real-Time Monitoring: Your Dashboard Lifeline
You can’t manage what you can’t see. A voltmeter on your dash is a start, but most factory voltmeters are slow and inaccurate. For a high-performance Car Audio setup, you need a dedicated digital voltmeter that reads directly from the amplifier’s input terminals.
Real-time monitoring allows you to see the “sag” during heavy bass transients. If you see your voltage dipping below 12.5V while your engine is at 2,000 RPM, your electrical system is screaming for help.
Where to Install Your Voltmeter:
- At the Battery: To monitor the health of your primary charging source.
- At the Amp Terminals: The most important reading. This shows the actual voltage the amp is using after all cable losses.
- The Remote Display: Mount this on your dash so you can back off the volume the moment you see the volts drop.
The Role of the High Output Alternator
Your car’s stock alternator was designed to run your headlights and AC, not a 3,000-watt bass system. When your amps demand more current than the alternator can provide, the voltage crashes down to the Car Battery resting voltage (about 12.6V).
Installing a High Output Alternator is the “silver bullet” for voltage issues. These units are designed to produce 250A to 400A of current even at idle. This keeps your rail at a rock-solid 14.4V, allowing your amps to produce more power with less heat.
The “Big 3” Upgrade: Fixing the Foundation
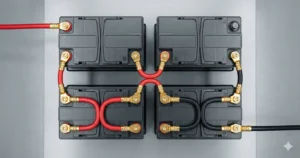
Before buying a second battery, you must perform the Big 3 Upgrade. Your car’s factory wiring is the bottleneck. This upgrade involves adding 0-gauge OFC Cables to these three points:
- Alternator Positive to Battery Positive.
- Battery Negative to Chassis (Ground).
- Engine Block to Chassis (Ground).
This completes the circuit with minimal resistance. I’ve seen the Big 3 increase a car’s resting voltage by 0.5V just by eliminating the factory “choke points.”
AGM vs. Lithium: Choosing Your Car Battery
If the Big 3 and a new alternator aren’t enough, you need more reserve capacity.
- AGM Battery: Great for daily drivers. They handle vibrations well and can discharge quickly for bass hits.
- Lithium Battery (LTO/LifePo4): The new standard. They hold a higher voltage (13V+) under heavy load and charge much faster than lead-acid.
A high-quality Car Battery is your “buffer.” It catches the voltage drop when the alternator can’t keep up with the millisecond-long spikes of a sub-bass drop.
Pro Diagnostic Workflow: Finding the Leak
If you still have Voltage Drop, it’s time to get technical. Use a high-quality multimeter to perform a “Voltage Drop Test.”
- Place one probe on the battery positive post and the other on the amplifier positive terminal.
- Play a test tone at high volume.
- The multimeter will show you exactly how many volts are being “lost” in that wire run. Anything over 0.5V means you have a bad connection, a blown fuse holder, or undersized wire.
Conclusion: Don’t Let Your System Starve
In Car Audio, power is the raw material. If the material is weak, the music is weak. By investing in OFC Cables, a Big 3 Upgrade, and constant Real-time Monitoring, you ensure your amplifiers stay in the “green zone.”
Your gear will stay cooler, your bass will hit harder, and you won’t be that guy on the side of the road with a melted fuse block. Keep those volts up, and keep the music loud.
FAQ:
1. Can a poor ground cause a voltage drop as bad as a poor power wire? Absolutely. Electricity flows in a circle. If your ground wire is attached to a painted surface or a thin piece of metal, it creates resistance. A bad ground is the #1 cause of “alternator whine” and amplifier failure.
2. Why does my voltage drop more when it’s hot outside? Resistance increases with temperature. As your engine bay heats up, your wires and your alternator become less efficient. This is why using OFC Cable is even more critical in hot climates.
3. Is a capacitor a good fix for voltage drop? No. A capacitor is a band-aid. It can help with very small, fast transients, but it cannot create energy. If your alternator is too small, a capacitor will actually become an extra load that the alternator has to struggle to charge.