Introduction
Let’s be honest — there is something about chocolate that makes every other dessert ingredient feel just a little bit ordinary. It has that deep, complex richness that hits differently from the very first bite. It is dramatic in color, endlessly versatile in texture, and somehow manages to be both comforting and luxurious at the same time. Whether it is a silky mousse, a warm molten cake, or a glossy no-bake tart, chocolate has this extraordinary ability to make even the simplest recipe look like it required serious culinary training. Spoiler: it usually did not.
The biggest myth in dessert-making is that beautiful chocolate creations belong exclusively to professional pastry chefs with years of training, marble countertops, and specialized equipment that most of us will never own. The reality is far more exciting than that. With the right recipes, a handful of quality ingredients, and a few presentation tricks that take seconds to learn, anyone — and we mean absolutely anyone — can put a chocolate dessert on the table that stops conversation mid-sentence and makes guests reach for their phones to take a picture before even picking up a spoon.
In this article, you will find five beautiful, easy chocolate desserts that were specifically designed for home bakers who want stunning results without the stress. Each recipe comes with pro tips on presentation, make-ahead strategies, and the kind of finishing touches that transform a good dessert into an unforgettable one. If you have ever wanted to end a dinner party with a genuine wow moment, this is exactly where you start. Let’s make something beautiful.
5 Beautiful and Easy Chocolate Desserts That Look Like a Patisserie Made Them
Why Chocolate is the Ultimate Ingredient for Stunning Desserts
Before diving into the recipes, it is worth taking a moment to understand why chocolate holds such a powerful position in the world of beautiful desserts — because once you understand its visual and culinary properties, you will find it much easier to work with confidently.
First, there is the color. Deep, dark chocolate has a near-black richness that photographs beautifully and creates dramatic contrast against almost anything — white cream, bright red berries, pale gold caramel, vibrant green pistachios. No other ingredient naturally creates this kind of visual tension without any effort on your part.
Second, there is the texture range. Chocolate can be molten and flowing, set into a glossy ganache, whipped into an airy mousse, tempered into a crisp snap, or baked into a dense, fudgy brownie — sometimes all within the same dessert. This versatility means that with a single ingredient, you can create completely different sensory experiences depending on how you handle it.
Third — and this is the part that beginners tend to underestimate — chocolate is remarkably forgiving once you understand a few basic rules. It melts beautifully with gentle heat, sets reliably when cooled, and carries flavor additions (salt, citrus, coffee, spice) with remarkable grace. The learning curve is real but short, and the rewards come quickly.
The 5 Essential Ingredients That Make Chocolate Desserts Look Professional
Keep these five items consistently stocked and you will always be one step away from a beautiful chocolate dessert:
High-quality dark chocolate (70% cocoa): The single most important investment you can make in chocolate baking. Higher cocoa content means more complex flavor, a deeper color, and a better snap and gloss when melted. The difference between a 70% single-origin bar and a generic baking chocolate is enormous — in flavor, in appearance, and in the confidence it gives you at the table.
Flaky sea salt: A few crystals of flaky sea salt scattered over any chocolate dessert right before serving does something almost magical. It intensifies the chocolate flavor, creates a sophisticated contrast, and adds a textural sparkle that signals attention and care. It is the single cheapest and most effective finishing touch in all of dessert-making.
Fresh raspberries or strawberries: The tartness of red berries is the natural counterpart to the bitterness of dark chocolate — they have been in a perfect relationship for centuries. Beyond flavor, their vivid red-against-dark-brown contrast is visually stunning and effortless to achieve.
Heavy cream: Whipped to soft, billowing peaks and placed alongside or on top of any chocolate dessert, fresh whipped cream adds lightness, color contrast and a visual generosity that instantly communicates abundance and care. Always whip it fresh — the difference from canned cream is immediately visible and immediately tasteable.
Cocoa powder (unsweetened, good quality): Dusted through a fine sieve over a finished dessert, cocoa powder creates that iconic, velvety surface that is the signature finishing touch of French and Italian chocolate patisserie. It costs almost nothing, takes three seconds to apply, and reliably makes any chocolate dessert look significantly more professional.
Recipe 1: Chocolate Lava Cake with Raspberry Coulis
The dessert that made an entire generation fall in love with chocolate all over again
The chocolate lava cake — or moelleux au chocolat, as it is known in France — is perhaps the most dramatic individual dessert in the entire repertoire of home baking. That moment when a spoon breaks through the surface and a river of warm, liquid chocolate flows out onto the plate is one of those small, perfect pleasures that never gets old, no matter how many times you have seen it. And here is the most liberating truth about this recipe: it is one of the easiest things you can make, and it can be prepared hours in advance.
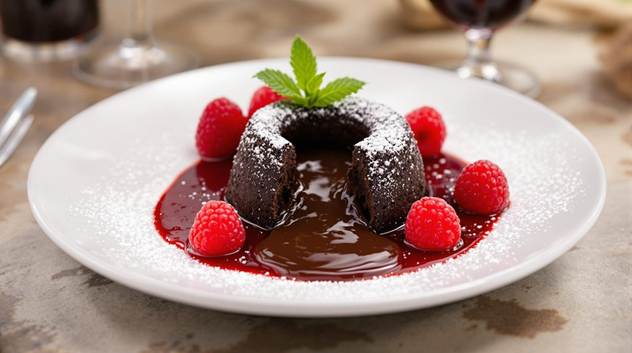
Ingredients (makes 6 individual cakes):
For the lava cakes:
- 200g dark chocolate (70% cocoa), roughly chopped
- 150g unsalted butter, plus extra for greasing
- 4 whole eggs
- 4 egg yolks
- 150g caster sugar
- 80g all-purpose flour, sifted
- 1 generous pinch of flaky sea salt
- Cocoa powder, for dusting the ramekins
For the raspberry coulis:
- 200g fresh or frozen raspberries
- 3 tablespoons icing sugar
- 1 teaspoon fresh lemon juice
To serve:
- Good quality vanilla ice cream or softly whipped cream
- Fresh raspberries
- Icing sugar for dusting
- Fresh mint leaves
Method:
Preparing the ramekins: This step is more important than it sounds — a properly prepared ramekin is the difference between a cake that releases cleanly and one that sticks and falls apart at the most unfortunate moment. Brush each ramekin generously with softened butter, covering every surface including the rim. Dust with cocoa powder (not flour — cocoa keeps the exterior dark and beautiful), tap out any excess and refrigerate while you prepare the batter.
Making the batter: Melt the chocolate and butter together in a heatproof bowl set over a pan of barely simmering water, stirring gently until completely smooth and glossy. Do not let the bowl touch the water and do not rush this with high heat — slow and gentle is everything here. Remove from heat and allow to cool for 5 minutes.
In a large bowl, whisk the eggs, yolks and sugar together vigorously for 3 to 4 minutes until the mixture becomes noticeably paler and slightly thickened. Pour the cooled chocolate mixture into the egg mixture and fold together with a spatula until just combined. Sift over the flour and the salt, and fold in with gentle, confident strokes — stop the moment the flour disappears.
Divide the batter evenly among the prepared ramekins, filling each about three-quarters full. At this point, you have two options: bake immediately, or cover with plastic wrap and refrigerate for up to 24 hours.
Baking: Preheat your oven to 220°C (425°F). If baking from the refrigerator, add 2 extra minutes to the baking time. Bake for exactly 10 to 12 minutes — the edges should be set and pulling slightly from the sides of the ramekin, but the center should still have a very visible wobble when gently shaken. This wobble is your guarantee of the liquid center.
Rest for exactly 1 minute. Run a thin knife around the edge, place a plate firmly on top and flip in one confident, decisive movement. Leave the ramekin sitting over the cake for 10 seconds before lifting — this allows the steam to help release the cake cleanly.
Making the raspberry coulis: Blend the raspberries, icing sugar and lemon juice until smooth. Pass through a fine sieve to remove seeds. Taste and adjust sweetness. The coulis can be made up to 3 days in advance and stored in the refrigerator.
Plating: Spoon a generous pool of raspberry coulis to one side of the plate — not centered, slightly offset. Place the unmolded lava cake in the center of the coulis. Add a small scoop of vanilla ice cream on the opposite side. Scatter 3 fresh raspberries, dust the whole plate lightly with icing sugar and add a small mint leaf. The drama begins when the first spoon breaks through.
Pro tip:
Always bake one test cake before your dinner party to calibrate your specific oven. Every oven runs slightly differently — one extra minute is the difference between a molten center and a fully set cake. The test cake is your insurance policy, and you get to eat it immediately as your reward. Not a bad deal.
Recipe 2: Chocolate Mousse Cups with Berries and Chocolate Shards
Cloud-like, elegant and completely make-ahead
A properly made chocolate mousse is one of the most sophisticated textures in all of dessert-making — simultaneously rich and weightless, intensely chocolatey yet somehow light enough that you always want one more spoonful. Served in individual glass cups with visible layers and finished with beautiful garnishes, it transforms a simple recipe into something that looks genuinely impressive.
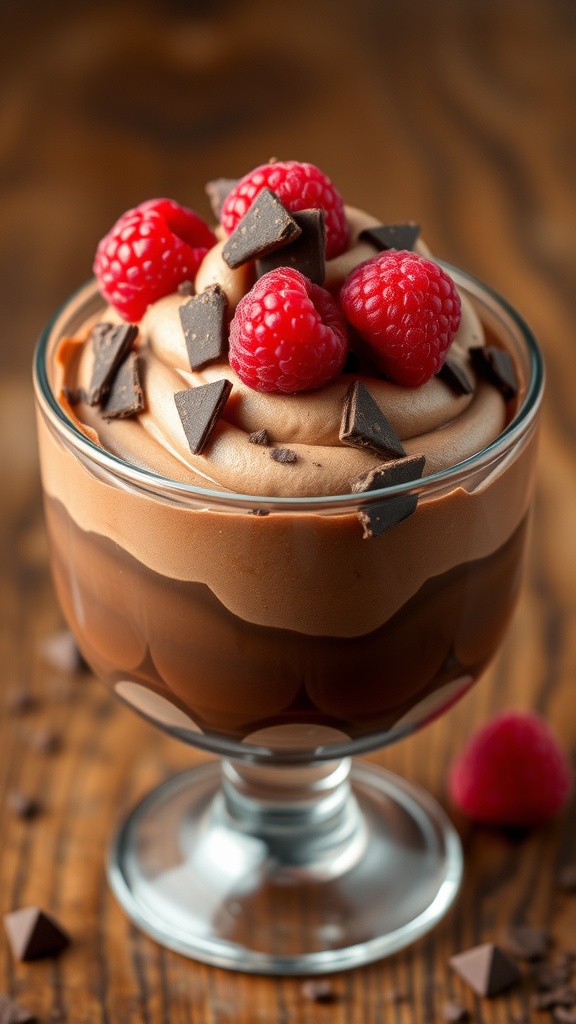
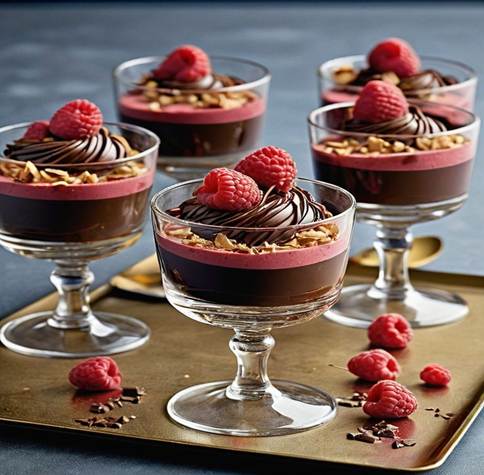
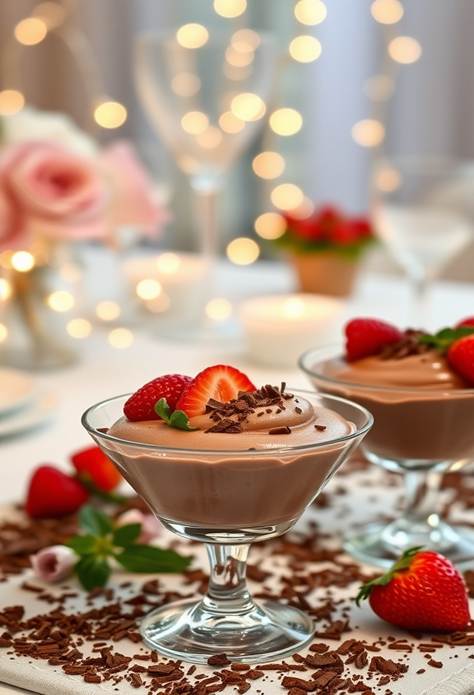
Ingredients (serves 6):
For the mousse:
- 220g dark chocolate (70% cocoa), finely chopped
- 6 eggs, yolks and whites separated
- 4 tablespoons caster sugar, divided
- 300ml heavy cream, very cold
- 1 pinch of fine sea salt
- 1 teaspoon pure vanilla extract
For the base layer:
- 150g chocolate digestive biscuits or Oreos, crushed
- 50g unsalted butter, melted
To garnish:
- Mixed fresh berries — raspberries, blueberries, strawberries
- Dark chocolate shards (made by spreading melted chocolate thinly on parchment, refrigerating until set, then breaking into irregular pieces)
- Softly whipped cream
- Cocoa powder for dusting
- Fresh mint
Method:
Making the biscuit base: Combine the crushed biscuits with the melted butter until the mixture resembles damp sand that clumps when pressed. Divide evenly among 6 glass cups or tumblers and press down firmly with the back of a spoon to create a compact, even layer. Refrigerate while you make the mousse.
Making the chocolate mousse: Melt the chocolate gently over a bain-marie until completely smooth. Remove from heat and allow to cool to room temperature — this is important, as hot chocolate added to eggs will scramble them.
Beat the egg yolks with half the sugar until pale and thick, about 3 minutes. Stir this into the cooled chocolate mixture until fully incorporated and smooth.
In a separate clean bowl, whip the cold heavy cream with the vanilla to soft peaks — it should hold its shape but still look glossy and yielding, not grainy. Fold gently into the chocolate mixture in two additions.
In another clean bowl with spotlessly clean beaters, whip the egg whites with the salt to soft peaks. Add the remaining sugar and continue beating to firm, glossy peaks. Fold into the chocolate cream in three additions, each one preserving as much volume as possible. The final mousse should feel light as a cloud — if it feels dense, the egg whites were likely over-folded.
Spoon or pipe the mousse over the biscuit bases in each glass. Cover and refrigerate for a minimum of 4 hours, or overnight.
Finishing and garnishing: Just before serving, place a small mound of fresh berries at the center of each mousse cup. Add a rosette of softly whipped cream using a spoon or piping bag. Push two or three chocolate shards in at different angles for height and drama. Dust very lightly with cocoa powder and add a single mint leaf.
Pro tip:
The chocolate shards are the detail that elevates this dessert from lovely to spectacular. Make them in advance and store between layers of parchment paper in the refrigerator, they keep perfectly for up to 2 weeks and can be used to garnish any chocolate dessert on this list.
Recipe 3: No-Bake Chocolate Tart with Salted Caramel
The glossiest, most dramatic slice you will ever cut
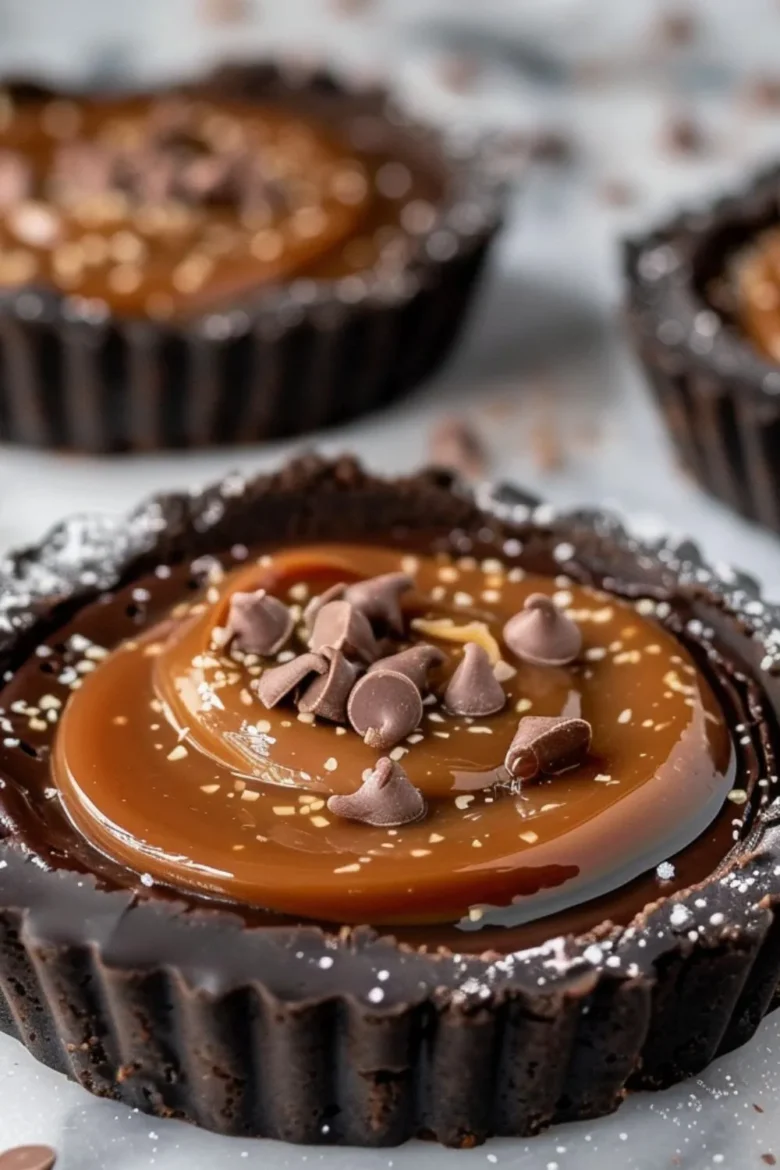
This no-bake chocolate tart is the kind of dessert that makes people genuinely suspicious that you secretly went to pastry school. The filling is a silky, intensely dark ganache that sets into a perfectly sliceable but melt-in-the-mouth texture. Beneath it sits a salty, buttery caramel layer that no one sees coming and absolutely everyone loses their mind over. And the whole thing requires no oven, no bain-marie, and no special equipment whatsoever.
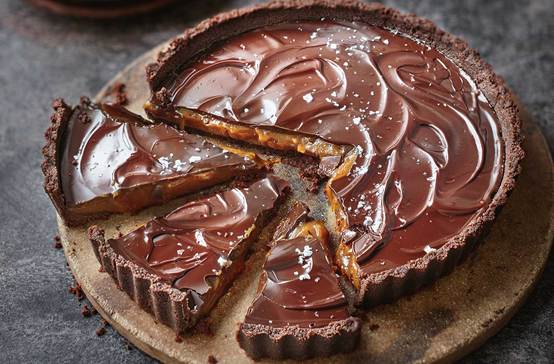
Ingredients (serves 8 to 10):
For the biscuit crust:
- 280g chocolate digestive biscuits (or Oreo cookies with filling removed)
- 100g unsalted butter, melted
- 1 pinch of flaky sea salt
For the salted caramel layer:
- 200g caster sugar
- 90g unsalted butter, cubed and room temperature
- 120ml heavy cream, warm
- 1 teaspoon flaky sea salt
For the chocolate ganache filling:
- 300g dark chocolate (70% cocoa), finely chopped
- 300ml heavy cream
- 2 tablespoons unsalted butter
- 1 tablespoon golden syrup or light corn syrup (for extra gloss)
- 1 teaspoon pure vanilla extract
To decorate:
- Extra flaky sea salt
- Dark chocolate shards or curls
- Edible gold leaf (optional, but extraordinarily effective)
- Fresh raspberries
Method:
Making the crust: Process the biscuits in a food processor to fine crumbs, or crush in a zip-lock bag with a rolling pin. Combine with the melted butter and salt until the mixture holds together when pressed. Press firmly and evenly into a 23cm loose-bottomed tart tin, pushing the mixture up the sides to create clean, even walls. Refrigerate for 30 minutes until firm.
Making the salted caramel: Place the sugar in a medium heavy-bottomed saucepan over medium heat. Resist stirring, just watch as the sugar begins to melt at the edges, then gently swirl the pan to encourage even melting. Cook until the caramel reaches a deep amber color, it should smell like butterscotch with just a hint of something almost burnt. This takes courage. Remove from heat, immediately add the butter (it will bubble vigorously, this is normal and expected) and stir until completely incorporated. Pour in the warm cream carefully and stir until smooth. Add the flaky salt.
Pour the salted caramel over the chilled biscuit base and spread to the edges. Refrigerate for 20 minutes until just set.
Making the ganache: Heat the cream in a small saucepan until it just begins to simmer around the edges, do not boil. Pour over the chopped chocolate and leave undisturbed for 2 minutes. Add the butter, golden syrup and vanilla, then stir from the center outward in slow, widening circles until completely smooth and glossy. The golden syrup is the secret to that mirror-like shine.
Pour the ganache over the set caramel layer in a single, confident pour. Gently tilt the tart tin to level the surface, do not spread with a spatula, as this creates marks. Refrigerate for at least 4 hours until completely set.
Decorating: Remove the tart from the tin carefully, the loose bottom makes this easy. Transfer to a serving plate or board. Scatter flaky sea salt across the surface. Arrange chocolate shards at different angles across one third of the tart. If using edible gold leaf, apply small, irregular pieces using a dry brush, the effect against the dark chocolate is breathtaking. Add a few raspberries for color.
Pro tip:
For perfectly clean, elegant slices, run a sharp knife under hot water, dry completely, and slice with one smooth downward motion — do not saw. Wipe and reheat the knife between each cut. This simple technique gives you those beautiful, restaurant-quality slices that hold their layers perfectly.
Recipe 4: Chocolate Pots de Crème with Coffee and Whipped Cream
The silkiest spoonful of chocolate you will ever experience
Pots de crème is a classic French dessert that translates roughly as “pots of cream” — and that name is exactly as accurate as it sounds. The texture is somewhere between a very soft set custard and a ganache: impossibly smooth, deeply rich, and so intensely chocolatey that a small pot is genuinely enough. Served in beautiful little espresso cups or ramekins with a cloud of lightly sweetened whipped cream on top, it is the definition of understated elegance.
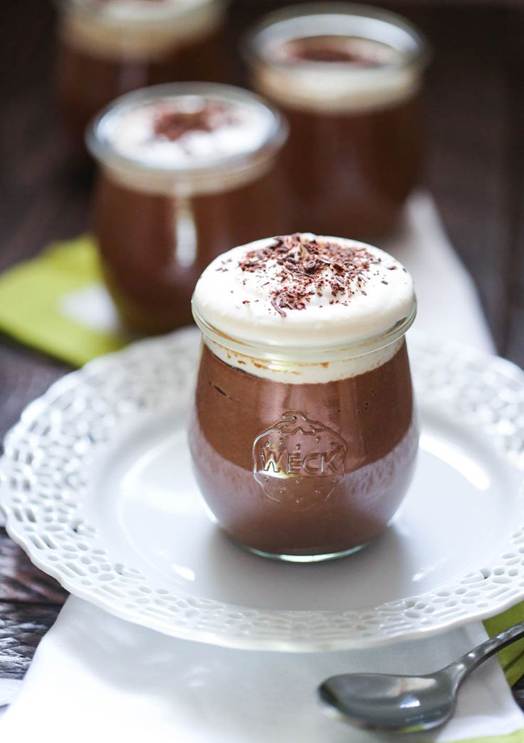
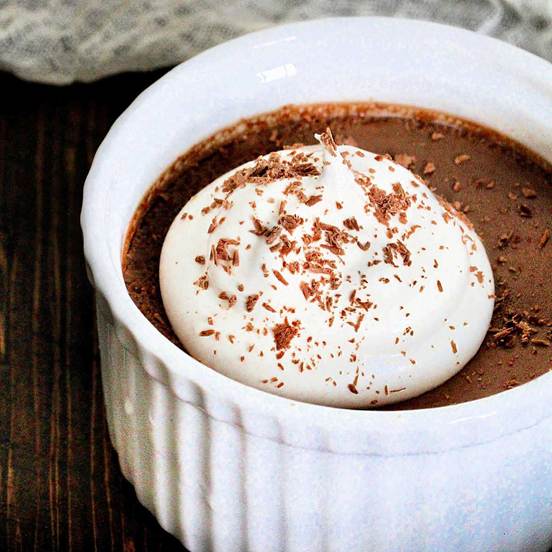
Ingredients (serves 6):
For the pots de crème:
- 200g dark chocolate (70% cocoa), very finely chopped
- 350ml heavy cream
- 150ml whole milk
- 1 shot of strong espresso (about 30ml), cooled
- 4 egg yolks
- 3 tablespoons caster sugar
- 1 teaspoon pure vanilla extract
- 1 pinch of fine sea salt
For the whipped cream topping:
- 200ml heavy cream, very cold
- 1 tablespoon icing sugar
- ½ teaspoon vanilla extract
To garnish:
- Cocoa powder, for dusting
- Chocolate-covered coffee beans
- Dark chocolate shavings
Method:
Preheat the oven to 150°C (300°F). Place 6 small espresso cups, ramekins or heatproof glasses in a deep roasting tin.
Place the finely chopped chocolate in a large heatproof bowl. Heat the cream and milk together in a saucepan over medium heat until just beginning to steam — not boiling. Pour over the chocolate and leave for 2 minutes, then stir gently from the center until completely smooth and combined. Stir in the espresso shot.
In a separate bowl, whisk the egg yolks, sugar, vanilla and salt together until just combined — not frothy or aerated. Gradually pour the warm chocolate cream into the egg mixture in a slow, steady stream, whisking constantly and gently. The key word here is gently — you want to combine them without creating foam, which would give you bubbles on the surface of the finished dessert instead of that signature smooth, flat mirror.
Strain the mixture through a fine sieve into a pouring jug — this removes any stray bits of cooked egg and guarantees a perfectly smooth result. Skim off any surface bubbles with a spoon.
Pour the mixture carefully and evenly into the cups. Pour enough hot (not boiling) water into the roasting tin to come halfway up the sides of the cups. Cover the entire tin loosely with foil.
Bake for 30 to 35 minutes. The pots are done when the edges are set but the centers still have a gentle, jelly-like wobble when the tin is carefully nudged. Remove from the water bath and cool to room temperature, then refrigerate uncovered for at least 3 hours, or overnight.
Finishing: Whip the cold cream with the icing sugar and vanilla to soft, generous peaks. Spoon or pipe a cloud of cream onto each pot. Dust with cocoa powder through a fine sieve. Place one chocolate-covered coffee bean in the center and scatter a few chocolate shavings around it.
Pro tip:
The water bath (bain-marie) is the technique that gives pots de crème their uniquely silky texture — it ensures the custard sets gently and evenly without the edges overcooking before the center sets. Do not skip it. The foil cover prevents a skin from forming on the surface. Both details matter enormously.
Recipe 5: Chocolate Bark with Pistachios, Dried Rose Petals and Sea Salt
The five-minute showstopper that everyone will think took hours
We saved the most liberating recipe for last. Chocolate bark requires no baking, no special equipment, no advanced technique and approximately five minutes of active work. Yet when it is finished and broken into irregular shards — dark chocolate gleaming, studded with vivid green pistachios, dusted with dried rose petals and scattered with flaky sea salt — it looks like something from an artisan chocolate shop in Paris. It is the ultimate proof that beautiful food and complicated food are not the same thing.
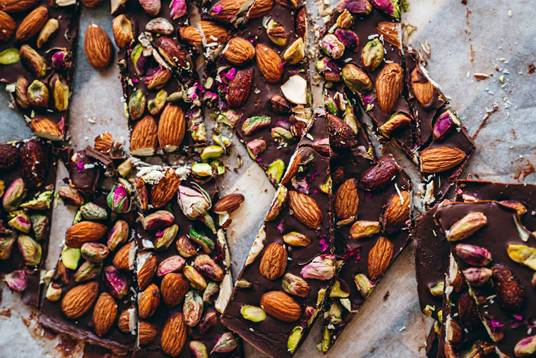
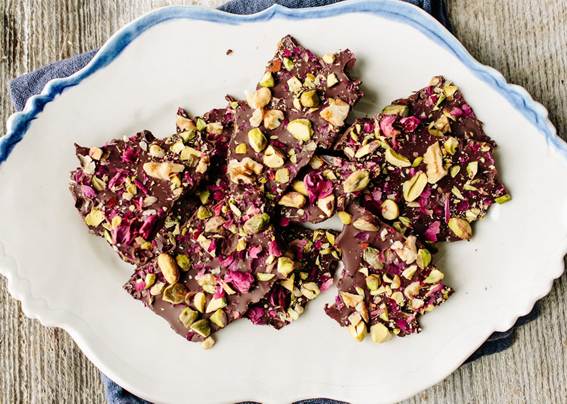
Ingredients (serves 8 to 10 as a petite dessert or gift):
- 400g dark chocolate (70% cocoa), roughly chopped
- 80g shelled pistachios, roughly chopped (a mix of whole and halved looks best)
- 2 tablespoons dried edible rose petals
- 1½ teaspoons flaky sea salt
- 1 tablespoon freeze-dried raspberries, lightly crushed (optional but stunning)
- 1 teaspoon edible gold dust or gold flakes (optional — purely for drama)
- Zest of half an orange (optional — adds a beautiful citrus note)
Method:
Line a large baking sheet with parchment paper and set aside.
Melt the chocolate gently. The simplest method: place the chopped chocolate in a microwave-safe bowl and heat in 30-second bursts at 70% power, stirring thoroughly between each burst, until about 80% melted. Remove and stir the residual heat through until completely smooth — this prevents overheating and preserves the chocolate’s natural gloss.
Pour the melted chocolate onto the lined baking sheet and spread with a spatula into a rough rectangle about 5mm thick. Do not worry about perfectly straight edges — the irregular, organic shape is part of the beauty.
Working quickly before the chocolate begins to set, scatter the toppings across the surface. Start with the pistachios, distributing them evenly. Follow with the rose petals, letting them fall naturally and not symmetrically. Add the freeze-dried raspberries if using, then a generous, even scatter of flaky sea salt. Finish with a dusting of gold if you choose to use it — apply with a dry brush or simply puff gently over the surface.
Transfer the baking sheet to the refrigerator and leave undisturbed for at least 1 hour until completely set. Once set, break the bark into irregular pieces of varying sizes — some large, some small. The imperfect edges are part of the aesthetic.
Arrange on a beautiful plate or board, or package in a cellophane bag tied with ribbon as a gift.
Pro tip:
Chocolate bark is one of the most versatile recipes in this entire list. The dark chocolate and pistachio base works with almost any topping combination — dried mango with chili, toasted coconut with macadamia, crystallized ginger with orange zest, or a classic combination of almonds and dried cranberries for the holiday season. Master the technique once and you have an effortless, impressive dessert for every occasion on the calendar.
How to Make Any Chocolate Dessert Look Like it Came From a Patisserie
The recipes are only half the story. These finishing techniques work on every chocolate dessert and require nothing more than a few seconds and a steady hand:
The fine sieve finish: Hold a small sieve containing cocoa powder or icing sugar approximately 30 centimeters above the dessert and tap gently. The height creates an even, delicate veil that looks professionally applied. Too close and it lands in uneven patches. The technique takes one practice run to master and transforms every dessert it touches.
Strategic sauce placement: Rather than pouring a coulis or caramel sauce directly over a dessert, use a spoon to create a deliberate pool to one side of the plate, then place the dessert slightly off-center into it. This asymmetry immediately looks more considered and elegant than a centered pour.
The quenelle: Instead of a round scoop of whipped cream or ice cream, drag a warm spoon through the mixture at an angle to create an oval, three-pointed shape. It takes about thirty seconds of practice and signals genuine patisserie technique to anyone who notices.
Micro herbs and edible flowers: A single sprig of micro mint or one small edible flower placed deliberately at the edge of a dessert costs almost nothing and communicates extraordinary care. Find edible flowers at specialty grocery stores or grow pansies, nasturtiums or violas in a small pot on a windowsill.
Warm plates for warm desserts: Always serve warm chocolate desserts on warm plates. A cold plate drops the temperature of a lava cake or warm brownie within two minutes. Simply run plates under hot water and dry quickly before plating — a detail borrowed directly from restaurant kitchens.
Common Mistakes That Ruin Chocolate Desserts (and How to Avoid Them)
Overheating the chocolate: Chocolate scorches quickly and seized chocolate — when it becomes grainy and clumped — cannot be recovered. Always melt gently, whether over a bain-marie or in the microwave in short bursts. The moment the chocolate looks mostly melted, remove the heat and stir the rest through. Patience here is rewarded every single time.
Using low-quality chocolate: In recipes where chocolate is the primary flavor, the quality of the chocolate you choose is the quality of the dessert you serve. A 70% single-origin bar from a reputable brand will produce results that an inferior product simply cannot replicate, regardless of how carefully you follow the recipe. This is the one place where it is genuinely worth spending a little more.
Skipping the resting time: Every recipe on this list benefits from refrigerator time — and most require it for structural reasons. A mousse that has not set, a ganache tart that has not chilled through, or a pot de crème that was not given time to firm: all of these will be delicious but visually and texturally disappointing. Respect the resting times and plan your timeline accordingly.
Over-mixing mousse and aerated batters: The light, cloud-like texture of a chocolate mousse comes entirely from the air beaten into the egg whites and cream. Every over-enthusiastic fold removes some of that air and makes the mousse denser and heavier. Use a large spatula, work in confident, sweeping motions from the bottom of the bowl, and stop the moment everything is just combined.
Garnishing too far in advance: Fresh berries weep juice, whipped cream deflates, cocoa powder absorbs moisture and loses its velvety appearance. Apply all garnishes and finishing touches as close to serving time as possible — ideally in the final 5 to 10 minutes before the dessert reaches the table.
Conclusion
Beautiful chocolate desserts have never been the exclusive territory of trained pastry chefs — they have always belonged to anyone willing to use good ingredients, follow a reliable recipe, and pay attention to the small finishing details that turn something delicious into something genuinely memorable. With these five recipes, you have a complete collection that covers every occasion: the dramatic lava cake for intimate dinners, the make-ahead mousse cups for easy entertaining, the showstopping no-bake tart for special celebrations, the quietly elegant pots de crème for sophisticated gatherings, and the effortless bark for everything in between. Choose the one that excites you most, gather your ingredients, and go make something beautiful. Your kitchen — and your guests — are more than ready for it.
Frequently Asked Questions (FAQ)
1. Can I make all of these recipes dairy-free? Yes, with straightforward substitutions. Replace heavy cream with full-fat coconut cream in every recipe — it whips well, sets beautifully in ganaches and mousses, and adds a subtle tropical note that actually complements dark chocolate very nicely. Use a good quality dairy-free butter in the crust and caramel. The pots de crème will need a plant-based milk in place of whole milk — oat milk produces the closest result in terms of richness and body.
2. What is the best way to store leftover chocolate bark? Store chocolate bark between layers of parchment paper in an airtight container at a cool room temperature — not in the refrigerator, as the humidity causes condensation that creates white sugar bloom on the surface. At room temperature away from direct sunlight, it keeps beautifully for up to two weeks, making it an ideal make-ahead gift or party dessert.
3. My lava cake came out fully set with no molten center. What went wrong? One of two things: the oven temperature was too low, meaning the outside did not set quickly enough relative to the inside — or the cake was baked for too long. Both issues are solved by the test cake recommendation in the recipe notes. The ramekin size also matters — a smaller ramekin bakes faster than a larger one. Use ramekins of 150ml to 180ml capacity for the timings given in this recipe.
4. Can I make the chocolate tart with milk chocolate instead of dark? You can, but the results will be significantly sweeter and the ganache will be softer and harder to slice cleanly, as milk chocolate contains more sugar and less cocoa butter than dark. If you prefer a milder flavor, try a blend of two thirds dark chocolate and one third good-quality milk chocolate — you get a slightly sweeter, creamier result while retaining enough structure and bittersweet depth to balance the salted caramel beautifully.
5. Which of these five desserts is most suitable for a large dinner party of 12 or more guests? The chocolate bark and the no-bake chocolate tart are your best options for large groups. The bark can be made in large quantities days in advance with minimal effort and serves beautifully as a shared dessert on a board. The tart scales up easily — simply make two tarts the day before and refrigerate until needed. Both require no last-minute cooking, no individual plating under pressure, and no oven work on the day of your event, which makes the entire hosting experience significantly more relaxed and enjoyable.