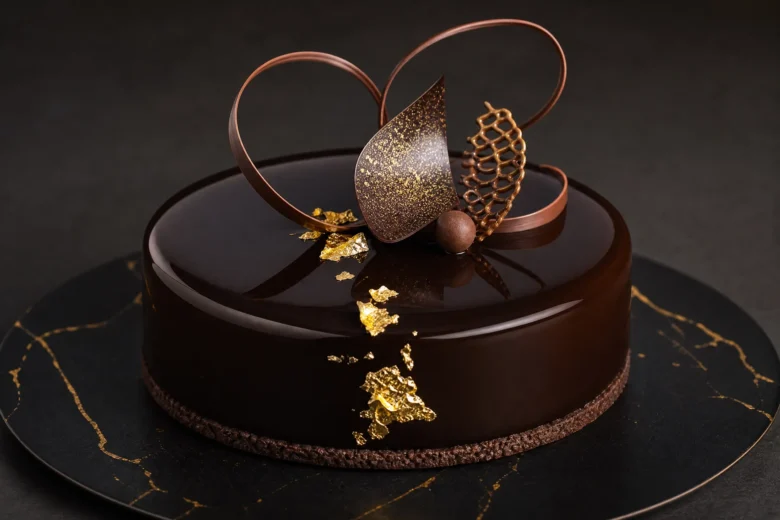
There is a distinct silence that falls over a dinner table when a truly spectacular cake arrives. It is the kind of cake that seems almost architectural, making guests lean forward and ask with genuine reverence: “You made this?”
The secret that the world of elaborate, mirror-glazed, and mousse-filled cakes keeps hidden is simple: they are far more achievable than they look. The magic is mostly in the organization, not the technique.
This guide breaks down the architecture of the modern entremet, outlines the essential tools you need, and shares professional-quality recipes engineered for home kitchens.
What Is an Entremet?
Originating from the French culinary tradition, the word entremet literally means “between courses.” Today, it describes a multi-component, multi-textured dessert cake that combines distinct architectural layers beneath a perfectly smooth finish.
The Anatomy of a Modern Entremet
Classic entremets are assembled upside-down in a ring mold or springform tin, then frozen and flipped. Because gravity presses the top layer perfectly flat against the smooth bottom of the mold, the cake emerges with an impossibly perfect surface.
A standard entremet consists of three to five components:
- The Base Layer: A sponge (genoise, joconde, dacquoise) or a crunch layer (feuilletine, praline), providing structure and texture contrast.
- The Insert: A frozen fruit compote, jelly, or ganache layer buried inside the filling that creates a beautiful colored center when sliced.
- The Mousse or Cream Filling: The main body of the cake (chocolate, fruit, or caramel mousse) that delivers volume and an airy texture.
- The Glaze or Finish: A glossy mirror glaze or a textured velvet cocoa butter spray.
- The Garnish: Fresh fruit, edible flowers, or chocolate decorations that add the final artisanal flourish.
Essential Tools, Techniques, and Ingredients
The Essential Tool Kit
You do not need a professional pastry kitchen to succeed. You only need a few key pieces of equipment:
- Acetate Cake Collars: Strips of food-safe plastic used to line the inside of your mold. They ensure perfectly smooth sides and make unmolding effortless.
- Digital Kitchen Scale: Baking is exact chemistry. Measuring by weight (grams) is non-negotiable for success.
- Digital Thermometer: Crucial for making caramel and ensuring a mirror glaze is poured at the exact temperature required.
- Offset Palette Knife: Essential for smoothing fillings and cleanly transferring delicate layers.
- Springform Tins: High-quality 18cm (7-inch) and 20cm (8-inch) tins form your structural foundation.
5 Core Techniques to Master
1. Folding
Combining a light, airy element (like whipped meringue) into a heavier base without deflating the trapped air. Use a large rubber spatula and a gentle, sweeping “J-motion” from the bottom of the bowl upward.
2. Blooming Gelatin
Sprinkle unflavored powdered gelatin over cold water and let it sit for 5 minutes to fully absorb the liquid before melting it into warm ingredients. Skipping this step causes unsightly gelatin lumps.
3. Making Ganache
Pour hot cream over finely chopped chocolate, let it rest for 1 minute, then stir from the center outward in small circles until smooth and shiny.
4. Baking a Clean Sponge
Always use room-temperature eggs and butter, and never open the oven door during the first two-thirds of the baking cycle.
5. Working with Mirror Glaze
A mirror glaze must be poured at exactly 32°C–35°C (90°F–95°F) over a rock-hard, completely frozen cake. If it is too hot, it will melt your mousse; if it is too cold, it will set before it finishes cascading down the sides.
The Recipe Collection
1. Classic French Fraisier (Strawberry & Vanilla Cream Cake)
The Fraisier is the most iconic of all French celebration cakes. Its dramatic reveal—a ring of halved strawberries pressed against the sides—makes it look stunningly professional.
- Prep Time: 45 mins | Cook Time: 25 mins (+4 hours chilling) | Yield: 8–10 servings
Ingredients
The Genoise Sponge
- 4 large eggs (room temperature)
- 120g caster sugar
- 120g plain flour (sifted)
- 30g unsalted butter (melted and cooled)
- 1 tsp vanilla extract
The Vanilla Mousseline Cream
- 500ml whole milk
- 4 egg yolks
- 100g caster sugar
- 40g cornstarch
- 1 vanilla bean (split and scraped)
- 200g unsalted butter (softened and cubed, divided)
Assembly & Filling
- 600g fresh strawberries (hulled; half sliced lengthwise, half left whole)
- 3 tbsp strawberry jam (warmed)
- 2 tbsp kirsch or elderflower cordial (optional)
Method
- Bake the Sponge: Preheat the oven to 180°C (350°F). Whisk eggs and sugar in a heatproof bowl over simmering water until warm. Remove from heat and whip on high for 8–10 minutes until it reaches the “ribbon stage.” Fold in flour in three additions, drizzle in the melted butter, pour into a lined 20cm tin, and bake for 22–25 minutes. Cool completely, then slice horizontally into two even discs.
- Make the Cream: Whisk egg yolks, sugar, cornstarch, and vanilla seeds until pale. Pour scalded milk slowly into the egg mixture while whisking constantly. Return to the pan and cook over medium heat for 3–4 minutes until thick and bubbling. Stir in half the butter, press plastic wrap directly to the surface, and chill completely. Once cold, beat the remaining butter until fluffy, then incorporate the pastry cream one spoonful at a time until silky.
- Assemble: Line a 20cm springform tin with an acetate collar. Place the first sponge layer at the bottom and brush with the warmed jam and liqueur. Press the halved strawberries, cut-side out, tightly against the acetate collar. Pipe the mousseline cream into the gaps and arrange whole strawberries in the center. Cover with the remaining cream, top with the second sponge layer, and smooth a thin layer of cream over the top. Chill for at least 4 hours before removing the tin and collar.
2. Chocolate and Salted Caramel Mirror-Glazed Entremet
This is a modern pastry showstopper: a layer of rich chocolate sponge, a hidden center of liquid salted caramel, and a cloud-like dark chocolate mousse beneath a reflective, glossy glaze.
- Prep Time: 1 hour (over 2 days) | Cook Time: 30 mins (+overnight freeze) | Yield: 8–10 servings
Ingredients
The Insert & Base
- 16cm chocolate genoise sponge circle (prepared similarly to Recipe 1, replacing 15g of flour with cocoa powder)
- 150g caster sugar + 60ml water
- 150ml heavy cream (warmed) + 40g unsalted butter + 1 tsp sea salt
- 2 tsp powdered gelatin (bloomed in 1 tbsp water)
The Dark Chocolate Mousse
- 200g dark chocolate (70% cacao, chopped)
- 3 egg yolks + 60g caster sugar + 60ml whole milk
- 400ml heavy cream (whipped to soft peaks)
- 3 tsp powdered gelatin (bloomed in 2 tbsp water)
The Chocolate Mirror Glaze
- 150g caster sugar + 75ml water
- 100g sweetened condensed milk
- 150g dark chocolate (chopped)
- 10g powdered gelatin (bloomed in 60ml water)
Method
- The Caramel Insert (Day 1): Cook sugar and water to a deep amber caramel. Stir in warm cream, butter, and salt. Add bloomed gelatin, stir until smooth, and pour into a 16cm mold lined with plastic wrap. Freeze for 3 hours.
- The Mousse & Assembly (Day 1): Melt chocolate. Cook milk, sugar, and egg yolks to 82°C (180°F) to create a light crème anglaise. Stir in the bloomed gelatin, pour over the melted chocolate, and cool to 35°C (95°F). Fold in the whipped cream. Line a 20cm tin with acetate, pour in half the mousse, press the frozen caramel insert into the center, add the remaining mousse, and cap with the chocolate sponge. Freeze overnight.
- The Glaze (Day 2): Boil sugar, water, and condensed milk to 103°C (217°F). Remove from heat, dissolve the bloomed gelatin into it, pour over the chopped dark chocolate, and blend with an immersion blender until smooth. Cool to exactly 32°C–35°C. Unmold the frozen cake onto a wire rack and pour the glaze over it in a single, confident motion. Let drip, then transfer to a serving plate and defrost in the fridge for 2 hours.
3. Lemon and Elderflower Drizzle Cake
A magnificent single-layer alternative for when you want a simpler, comforting cake that focuses entirely on bright citrus and floral flavors.
- Prep Time: 20 mins | Cook Time: 45–50 mins | Yield: 8–10 servings
Ingredients
The Sponge & Drizzle
- 225g unsalted butter (softened) + 225g caster sugar
- 4 large eggs + 225g self-raising flour
- Zest of 3 lemons + 3 tbsp elderflower cordial + 2 tbsp milk
- Drizzle: Juice of 3 lemons + 3 tbsp elderflower cordial + 100g caster sugar
The Mascarpone Frosting
- 300g mascarpone cheese
- 150ml heavy cream + 3 tbsp icing sugar
- 1 tbsp elderflower cordial + zest of 1 lemon
Method
- Bake: Preheat the oven to 170°C (340°F). Cream butter and sugar for a full 5 minutes until nearly white. Add eggs one at a time, followed by the lemon zest and cordial. Fold in the sifted flour and milk. Bake in a lined 20cm tin for 45–50 minutes.
- Drizzle: Stir the lemon juice, elderflower, and sugar together. While the cake is still piping hot from the oven, poke holes deep into the sponge with a skewer and pour the drizzle evenly over the surface. Let cool completely in the tin.
- Frost: Whip the mascarpone, cream, icing sugar, cordial, and zest to soft, billowy peaks. Swirl generously over the top of the cooled cake and garnish with edible flowers or lemon slices.
4. Raspberry and Rose Mousse Cake with Pistachio Sponge
This romantic cake features a nutty, vibrant green pistachio sponge beneath a delicate, rose-scented raspberry mousse layer.
- Prep Time: 40 mins | Cook Time: 20 mins (+4 hours chilling) | Yield: 8–10 servings
Ingredients
The Pistachio Sponge
- 3 large eggs + 100g caster sugar
- 80g plain flour + 50g almond flour
- 30g finely ground pistachios + 30g melted butter
- Pinch of salt + ½ tsp vanilla extract
The Raspberry Rose Mousse & Insert
- 400g raspberries (blended, strained into a smooth puree) + 100g sugar
- 1–1.5 tsp rose water + juice of ½ lemon
- 4 tsp powdered gelatin (bloomed in 3 tbsp water)
- 400ml heavy cream (whipped to soft peaks)
- Jelly Insert: 200g strained raspberry puree + 2 tbsp sugar + 1.5 tsp gelatin
Method
- The Base: Make a genoise sponge using the eggs and sugar, then fold in the flours and ground pistachios. Bake at 180°C (350°F) for 18–20 minutes. Cool completely.
- The Insert: Warm the jelly ingredients together until the sugar and gelatin melt. Pour into a 16cm plastic-lined mold and freeze solid.
- The Mousse & Assembly: Mix the raspberry puree, sugar, lemon, and rose water. Warm a third of it to dissolve the bloomed gelatin, then mix back into the cold puree. Fold in the whipped cream. Assemble in an acetate-lined 20cm tin: pistachio sponge on the bottom, half the mousse, the frozen jelly disc in the center, and the remaining mousse smoothed over the top. Chill overnight.
5. Mango and Passion Fruit Tropical Entremet
A summer-inspired cake that pairs a chewy coconut meringue disc with sharp passion fruit curd and refreshing mango mousse.
- Prep Time: 50 mins | Cook Time: 25 mins (+overnight freeze) | Yield: 8–10 servings
Ingredients
The Coconut Dacquoise Base
- 3 large egg whites + pinch of cream of tartar
- 150g caster sugar + 20g icing sugar
- 80g desiccated unsweetened coconut
The Curd Insert & Mousse
- 120ml passion fruit pulp + 2 whole eggs + 2 egg yolks + 80g sugar
- 60g butter + 2 tsp gelatin (bloomed in 1 tbsp water)
- Mousse: 500g mango flesh (pureed) + juice of 1 lime + 80g sugar + 4 tsp gelatin + 400ml heavy cream (whipped)
Method
- Dacquoise: Whip egg whites and cream of tartar to a stiff meringue, gradually adding the sugars. Fold in the coconut, spread into a 20cm circle on parchment paper, and bake at 160°C (320°F) for 20–25 minutes until pale golden.
- Curd Insert: Whisk eggs, yolks, sugar, and passion fruit pulp over a pan of simmering water until thick (10–12 minutes). Stir in the bloomed gelatin and cubed butter. Pour into a 16cm mold and freeze solid.
- Mousse & Assembly: Warm a portion of the mango puree to melt the gelatin, stir back into the remaining cold puree, and fold in the whipped cream. Build in a 20cm tin with acetate: dacquoise at the bottom, half the mousse, the frozen passion fruit curd insert, and the remaining mango mousse. Freeze overnight. Finish with a passion fruit glaze if desired.
Mastering the Component Assembly Timelines
2 Days Before  ──► Bake the Sponges & freeze internal inserts (Caramel/Jelly)
1 Day Before   ──► Whip the Mousses, build the cakes upside-down, and freeze overnight
Serving Day    ──► Pour the warm Mirror Glaze (32°C) over frozen cakes & thaw in fridge
Frequently Asked Questions
Why do soufflé-style cakes and entremets rise or hold their shape?
Entremets rely on a structural balance between baked sponge components and cold-set gelatin or egg-white matrices. Gelatin locks the whipped mousse structure into place while frozen, allowing the cake to hold perfectly sharp lines after unmolding.
Can I make these cakes entirely ahead of time?
Yes. One of the greatest benefits of an entremet is that the assembled, un-glazed cake can be wrapped tightly in plastic wrap and kept frozen for up to 3 weeks. Simply glaze the cake the day before your dinner party.
What is the trick to slicing an entremet perfectly?
To get clean, professional restaurant-style slices, dip a long chef’s knife into hot water and wipe it completely dry before every single cut. The heated metal slices cleanly through the mousse and gel layers without pulling the fillings apart.